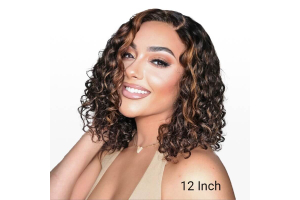

If you're searching for how to melt an HD lace frontal wig, you're likely after that flawless, skin-like finish that makes your install look undetectable. HD lace wigs are known for their ultra-thin, soft lace that blends beautifully with any skin tone—but the magic lies in the melt. With the right technique, tools, and a little patience, you can transform your wig install into a professional-level look right at home.
What Is How to Melt an HD Lace Frontal Wig?
Melting an HD lace frontal wig refers to the process of securing the lace to your scalp in a way that it appears invisible, giving the illusion that the hair is growing directly from your scalp. This is typically done using adhesive (or glueless methods), lace tint, and heat to press the lace into the skin.
Why is melting so important? Because HD lace is super delicate and designed to disappear—it just needs a little help to completely blend. When done properly, melting:
- Eliminates harsh lace lines
- Creates a smooth, undetectable hairline
- Keeps your wig secure and natural-looking
- Makes styles like updos or side parts more realistic
So if you’re wondering how to melt an HD lace frontal wig at home, the key is following a step-by-step method using gentle heat, light adhesive, and patience.
Who Should Choose It & When
Melting your lace isn’t just for influencers or stylists—it’s for anyone who wants to elevate their wig install. Here’s who will benefit most:
- First-time wig wearers: Learn a beginner-friendly method that builds confidence.
- Beauty lovers: Ideal for special occasions, photo shoots, or everyday slay.
- Protective style fans: Get the illusion of a laid scalp while preserving your natural hair.
- Busy professionals: Melt once and enjoy a clean, long-lasting install with minimal daily maintenance.
If you're wearing an HD lace wig from Luve Wigs, you're already starting with the best lace for a flawless melt—so let’s dive into how to perfect it.
Styling & Maintenance Tips
Here’s a step-by-step breakdown of how to melt an HD lace frontal wig:
Step 1: Prep Your Skin and Wig
- Clean your forehead with alcohol (or an alcohol-free cleanser if you have sensitive skin).
- Adjust your wig and secure the fit using an elastic band or wig grip.
- Cut the lace carefully around the hairline for a custom fit.
Step 2: Apply Adhesive or Gel
- Use a thin layer of lace glue or gel on the hairline and wait until it becomes tacky.
- Position the lace onto the adhesive, using the end of a comb or fingers to press it in place.
- You can also go glueless—just use an adjustable band and skip this step!
Step 3: Use Heat to Melt
- Place a melt band or satin scarf over your lace and gently blow-dry on warm for 5–10 minutes.
- This helps the lace “melt” into your skin and set in place.
Step 4: Blend and Perfect
- Remove the melt band and gently press the lace again with a warm comb.
- Use lace tint spray or a dab of foundation that matches your skin tone along the hairline for added realism.
- Lay your baby hairs if desired for a more natural frame.
Bonus Tip:
Keep your edges wrapped at night with a satin scarf to maintain the melt longer.
Conclusion
Now that you know how to melt an HD lace frontal wig, you're just a few steps away from the flawless hairline you’ve always wanted. Whether you're heading to brunch or slaying in selfies, a proper melt makes all the difference in your overall look.
Want to get started with the best lace? Explore our glueless lace wigs or check out our HD lace collection for premium options that are beginner-friendly and stylist-approved.
✨ Discover more at www.luvewigs.com — where confidence begins at the hairline.